Windows 11 Privacy and Cleanup Guide: Reduce Tracking, Temp Files, and Browser Data
Windows 11 privacy settings are worth spending a few minutes on when setting up a new computer—or cleaning up one that has been running for a while. Windows, applications, and web browsers accumulate temporary files, cached data, cookies, diagnostic information, and other data during normal use. Some of it is useful. Some of it eventually becomes clutter, and some of it is used for advertising, personalization, or tracking.
Instead, this is the cleanup I would do on a normal Windows 11 computer. Everything here can be done through Windows and browser settings, and the goal is simple: clean up unnecessary files, reduce some of the tracking and personalization I don’t need, and let Windows handle some of the maintenance automatically.
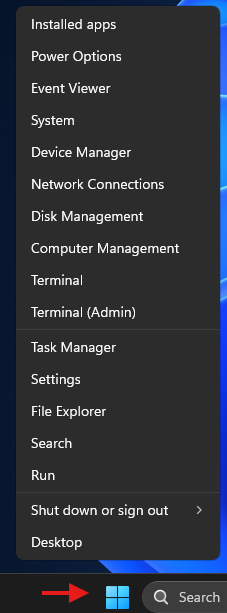
Start With Windows 11 Temporary Files
Windows 11 has a built-in temporary-file cleanup tool, so there usually isn’t a reason to install another utility just to remove basic system junk.
Go to:
Settings → System → Storage → Temporary files
Windows will scan the computer and display categories of files that can potentially be removed. Depending on the computer, you may see items such as:
- Temporary files
- Windows Update cleanup
- Delivery Optimization files
- DirectX shader cache
- Thumbnails
- Recycle Bin
- Downloads
- Previous Windows installation files
Don’t blindly check every box.
Pay particular attention to Downloads. If that option appears and you select it, Windows can delete files you’ve intentionally downloaded. The same basic rule applies to anything you’re unsure about: read the description before removing it.
Once you’ve reviewed the selections, choose Remove files.
This can sometimes recover a surprising amount of disk space, especially on a machine that has been through several Windows updates.
Configure Storage Sense and Let Windows Clean Up After Itself
Manual cleanup is useful, but I would rather configure the computer so that some of this maintenance happens automatically.
Go to:
Settings → System → Storage → Storage Sense
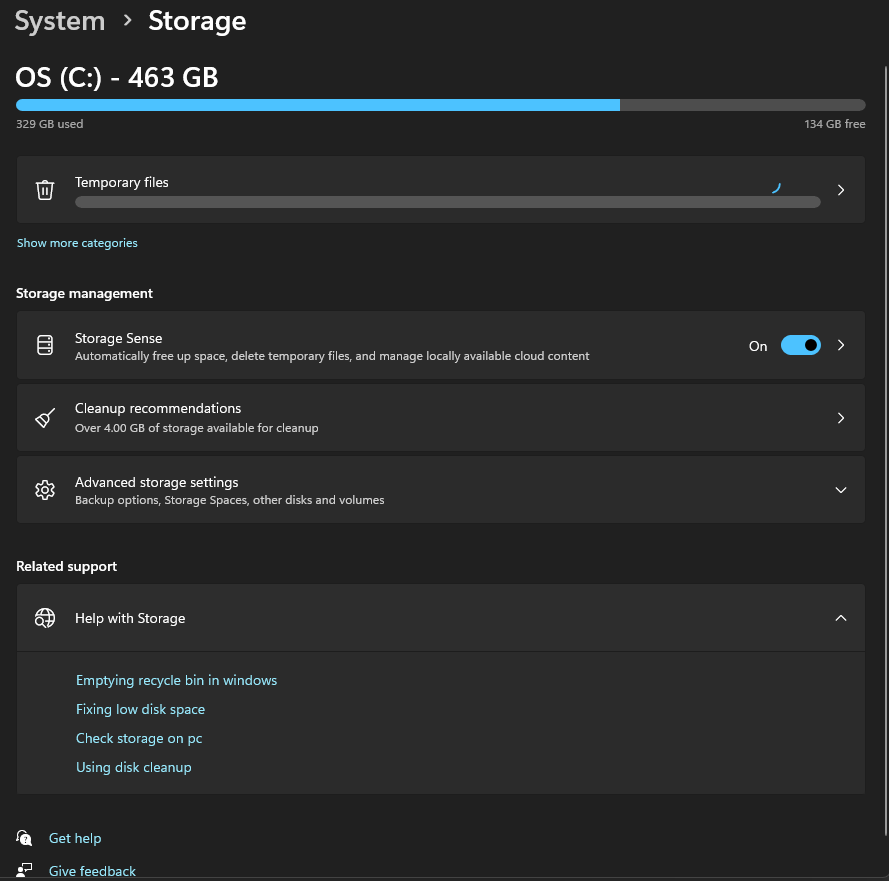
Turn Storage Sense on.
Storage Sense allows Windows 11 to automatically clean temporary files and manage certain other files based on rules you choose. Open the Storage Sense settings rather than simply turning it on and forgetting about it.
You can configure when Storage Sense runs and how long files remain in the Recycle Bin before Windows removes them.
One setting deserves particular attention: Downloads.
I generally don’t configure Storage Sense to automatically delete files from my Downloads folder. Downloads tends to become a temporary filing cabinet for a lot of people, and there may be installers, PDFs, documents, drivers, or other files in there that you still want.
I’d rather clean that folder manually.
If you use OneDrive, you’ll also see options concerning cloud content. Read those settings carefully. Making a OneDrive file online-only is different from deleting the file, but you should understand what Windows is doing before enabling automatic management.
Once Storage Sense is configured, you can also use Run Storage Sense now to perform an immediate cleanup.
The idea is straightforward: use Temporary Files when you want to perform a manual cleanup, and use Storage Sense to prevent some of that clutter from accumulating again.
Windows 11 Privacy Settings for Advertising and Personalization
Cleaning files gives you disk space. The next few changes are about privacy.
Open:
Settings → Privacy & security
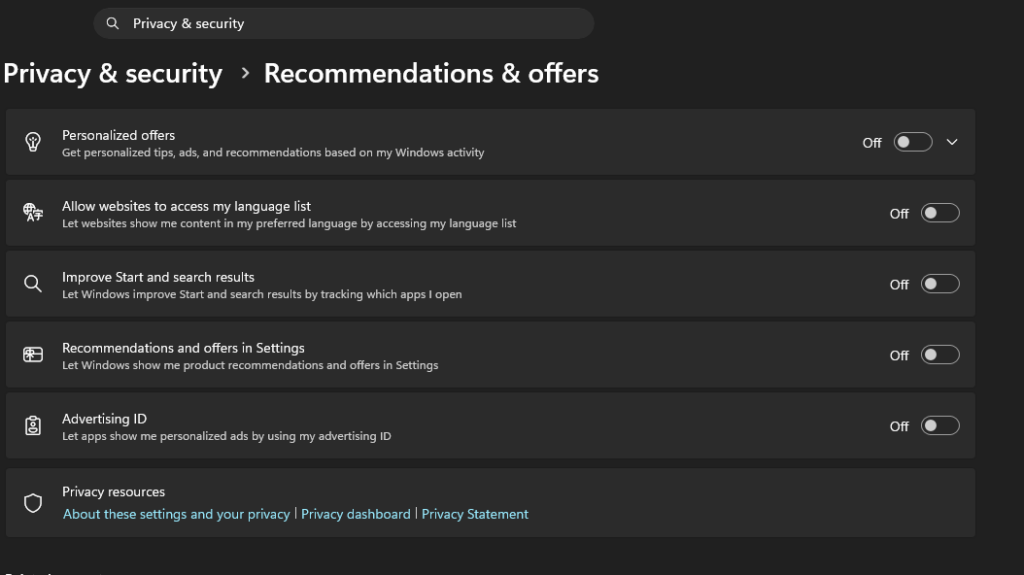
One of the first places I check is General.
Windows includes settings that allow apps to use an advertising ID and allow Microsoft to personalize recommendations based on how you use the system. Depending on your Windows 11 version, the wording may vary slightly.
Review options involving:
- Advertising ID
- Website access to your language list
- App launch tracking
- Suggested or personalized content
I don’t need Windows building a better advertising or recommendation profile for me, so I generally disable the personalization options I don’t find useful.
Turning these settings off doesn’t make you anonymous. It simply reduces one category of personalization and tracking.
That’s an important distinction throughout this guide.
Review Windows Diagnostic Data
Next, go to:
Settings → Privacy & security → Diagnostics & feedback
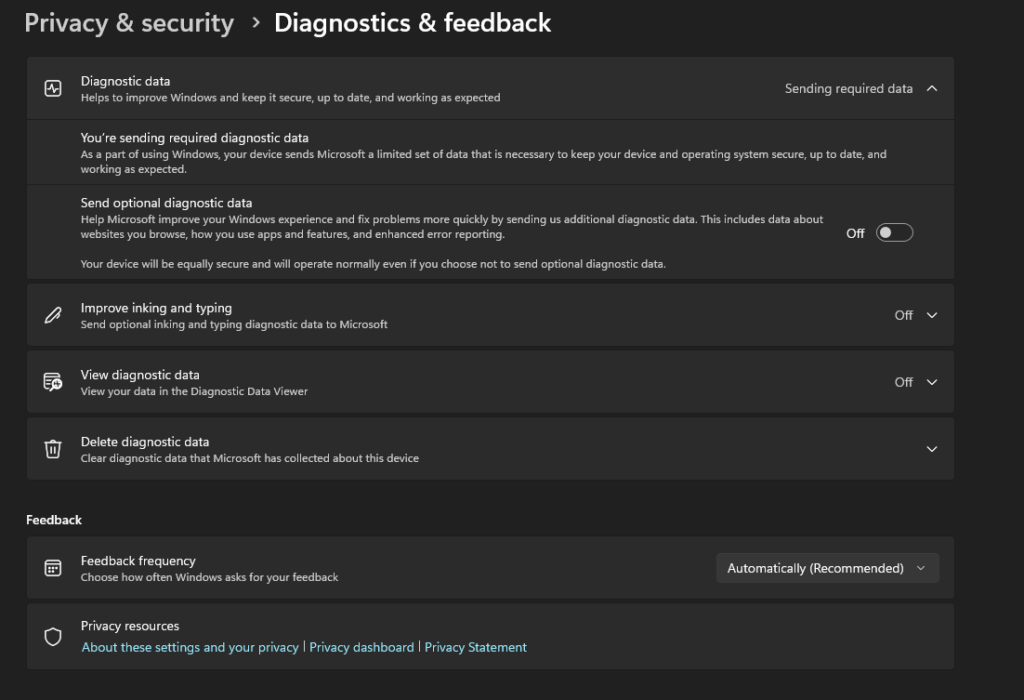
Windows uses diagnostic information for reliability, compatibility, troubleshooting, and product improvement. Some diagnostic information is required for Windows to operate as designed, while additional or optional diagnostic information can be controlled by the user.
Review the options available on your computer, particularly anything related to optional diagnostic data, tailored experiences, and similar personalization features.
If I don’t need an optional data-sharing feature, I generally turn it off.
I would not recommend trying to completely eliminate Windows telemetry using registry hacks, third-party scripts, firewall rules, or by disabling random services. Aside from being difficult to verify, those modifications can cause problems later with Windows features and updates.
Use the privacy controls Microsoft actually provides first.
Check Location, Camera, Microphone, and Other Permissions
The Privacy & security section also gives you control over what applications can access.
Take a few minutes to review:
Location
Camera
Microphone
Notifications
Contacts
Pictures and Videos
File system access
You don’t necessarily need to disable an entire permission category. Instead, look at which applications have access.
Zoom obviously needs a microphone if you use it for meetings. A mapping application may have a legitimate reason to know your location. Some random application you installed six months ago may not.
Privacy settings are more useful when they’re based on what you actually use rather than simply turning everything off.
Clean Up Your Browser
The browser is arguably more important for everyday tracking than many of the Windows settings people spend hours worrying about.
Whether you use Microsoft Edge, Google Chrome, Firefox, or another browser, periodically review the data it stores.
Look for the browser’s Privacy, Security, or Clear browsing data section.
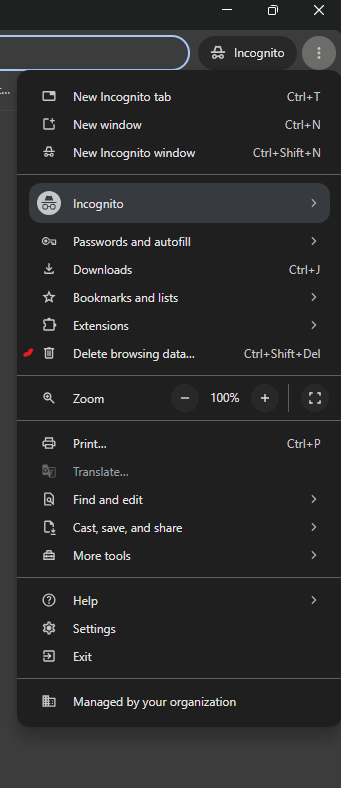
Typical categories include:
- Browsing history
- Cookies and site data
- Cached images and files
- Download history
- Site permissions
- Autofill information
- Saved passwords
Again, don’t blindly select everything.
Deleting cached files is generally harmless, although websites may load a little slower the first time you revisit them. Clearing cookies can improve privacy and fix certain website problems, but it will also sign you out of many websites.
Be particularly careful with saved passwords and autofill information. Don’t delete credentials unless you’re certain they’re stored somewhere else.
Privacy doesn’t stop with your computer. I’ve also put together a guide to Android and iPhone privacy settings for reducing unnecessary tracking on your phone.
Block More Browser Tracking
Cleaning browser data removes information that has already accumulated. Browser privacy settings help control what gets collected going forward.
The exact terminology varies between Edge, Chrome, and Firefox, but I review settings involving:
- Third-party cookies
- Tracking prevention
- HTTPS
- Secure DNS
- Location access
- Camera and microphone permissions
- Notifications
- Pop-ups and redirects
Third-party cookies are particularly worth reviewing. They have historically been used to follow browsing activity across different websites, although modern web tracking goes well beyond cookies.
Firefox and Edge also provide built-in tracking-protection features. Increasing protection can reduce tracking, but stricter settings occasionally cause a website to behave incorrectly.
That’s the tradeoff.
I would rather start with reasonable privacy settings and make an exception for the occasional broken website than weaken privacy everywhere.
Privacy and Security Aren’t the Same Thing
It’s worth making this distinction because the two terms are often mixed together.
Deleting temporary files doesn’t protect a computer from malware.
Clearing browser history doesn’t make you anonymous.
Disabling an advertising ID doesn’t prevent websites from identifying you through cookies, accounts, IP addresses, browser fingerprinting, and other techniques.
At the same time, installing antivirus software doesn’t prevent companies from collecting information you’ve agreed to share.
Privacy is about controlling information and reducing unnecessary collection. Security is about protecting the system, accounts, and data from unauthorized access or damage.
They overlap, but they’re not the same problem.
What I Wouldn’t Do to Windows 11
There are plenty of scripts online promising to “debloat” Windows 11, eliminate telemetry, disable dozens of services, and make the operating system completely private.
I don’t use that approach on computers I need to depend on.
A PowerShell script that disables 30 services may look impressive when you run it. Months later, when Windows Update, Microsoft Store, OneDrive, printing, networking, or another feature starts behaving strangely, remembering exactly what that script changed becomes much harder.
If I disable something, I want to know what I disabled and why.
Windows 11 already provides quite a few privacy controls. Start there.
A Simple Windows 11 Cleanup Routine
Most of these settings only need to be configured once. After that, maintenance doesn’t have to become a weekend project.
Every month or two, I would:
- Check Settings → System → Storage.
- Review Temporary files.
- Make sure Storage Sense is still enabled.
- Empty the Recycle Bin if necessary.
- Look through the Downloads folder manually.
- Review browser data and site permissions.
- Remove applications and browser extensions I no longer use.
- Check Windows Update and make sure the machine is current.
It takes a few minutes, doesn’t require third-party cleanup software, and doesn’t involve ripping pieces out of Windows that you may need later.
The goal isn’t to make Windows 11 invisible on the Internet. That’s not realistic.
The goal is to understand what the computer is storing, remove what you don’t need, reduce unnecessary tracking and personalization, and automate the safe parts of the cleanup with tools such as Storage Sense.
That’s a much more useful approach than clicking a mysterious “Optimize Everything” button and hoping for the best.
Microsoft also provides additional documentation on how Windows manages diagnostic data and privacy settings.